The following sections describe how to use the new StreetMap Premium locators in ArcGIS Pro and ArcGIS Enterprise.
Use the New Locators in ArcGIS Pro
The new locators are included with each StreetMap Premium release or the separate Locator Update releases on My Esri. Sign in to your My Esri account to download the appropriate 7-zip file(s) to your hard disk and unzip the file(s). You can then browse for the address locator(s) on disk, add the locator(s) to ArcGIS Pro, and begin using the ArcGIS Pro geocoding functionality.
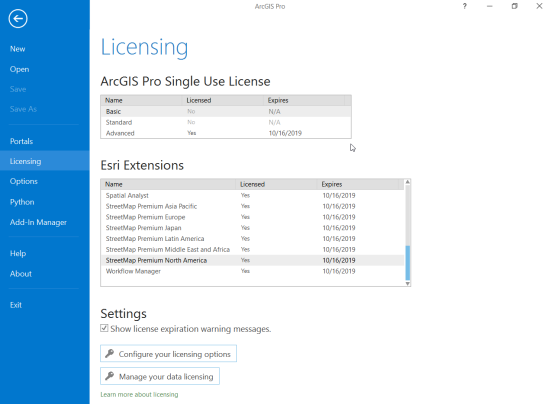
If you notice that a locator is unavailable or there is a red exclamation point (!) next to the locator name in ArcGIS Pro, check the Project tab under Licensing, Esri Extensions for your StreetMap Premium extension. If the StreetMap Premium extension is unavailable, check with your ArcGIS license administrator or contact Esri Customer Service.
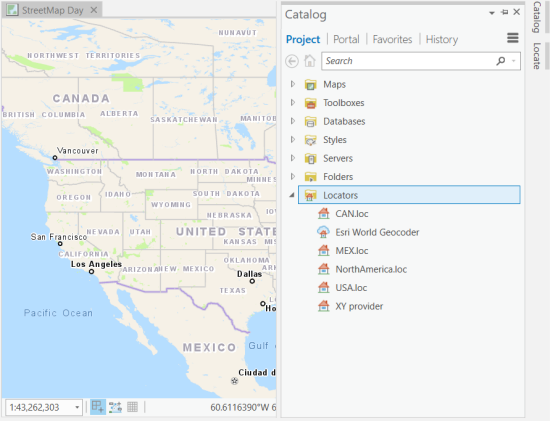
Add the new locator to your ArcGIS Pro project (.aprx) through the Catalog pane under Locators, right-clicking to Add Locator. You can then use any of the geocoding functionality such as What's here? (right-click on the map), the Locate tool, or the Geocode Addresses or Reverse Geocode geoprocessing tools.
See the ArcGIS Pro help topic Geocode with StreetMap Premium new locators in ArcGIS Pro for additional information about the New Locators.
Use the New Locators in ArcGIS Enterprise
To use the new locators in ArcGIS Enterprise (server and portal), you must have a StreetMap Premium extension for both ArcGIS Pro (discussed above) and ArcGIS Enterprise. If the StreetMap Premium extensions are unavailable, check with your ArcGIS license administrator or contact Esri Customer Service.
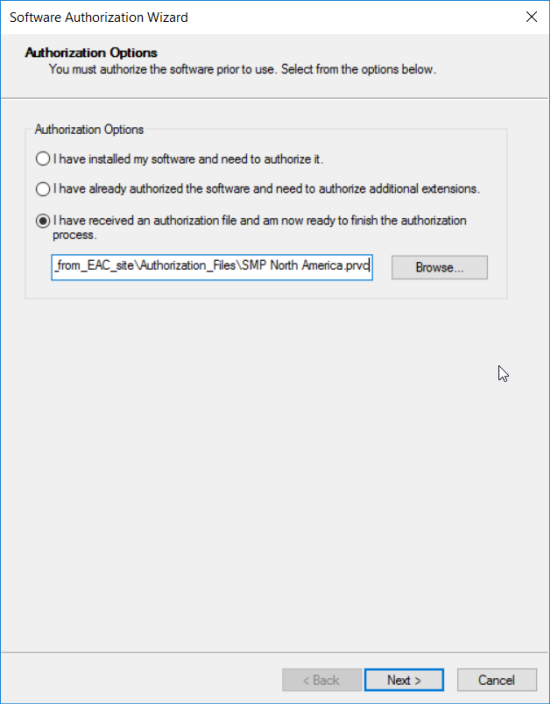
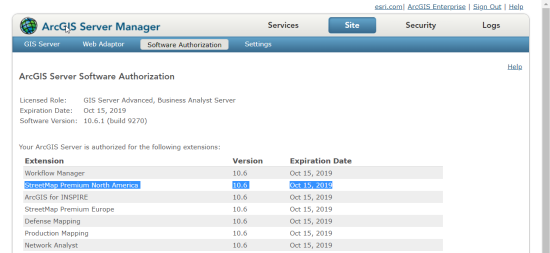
Use the Software Authorization for Server Wizard to install the StreetMap Premium extension for Enterprise. To check that your StreetMap Premium extension for Enterprise is installed, open ArcGIS Server Manager > Site > Software Authorization.
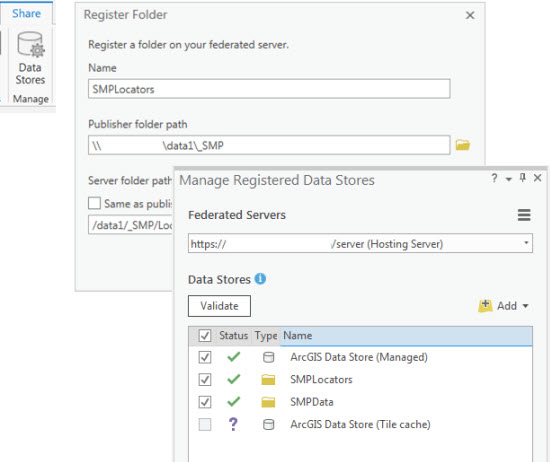
For Enterprise Administrator or Publisher roles, register the folder where you downloaded the new locators with your server using the Share tab > Data Stores icon in ArcGIS Pro. Use the Validate button to confirm your server has access (green check mark) to the folder location. If you skip this step, ArcGIS Pro will attempt to copy the locator to your server before publishing, increasing the time required for publishing.
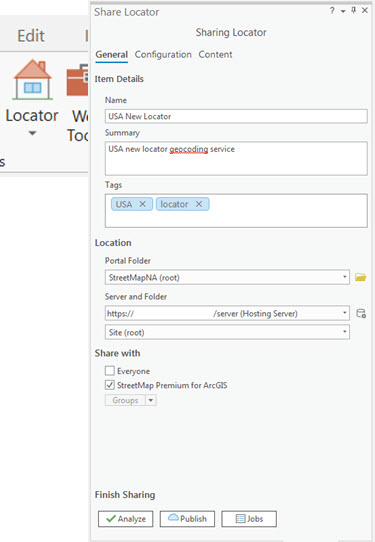
After adding your locator to ArcGIS Pro through the Catalog pane > Locators, you can publish the locator to your Enterprise. Under the Share tab > Locator icon, select the locator you just added to ArcGIS Pro. In the Share Locator dialog, fill in the required or desired inputs. Also review the Configuration and Content sections to change any default settings. Use the Analyze button to check for any potential errors. If there are no errors or warnings found, finish sharing the locator to your Enterprise with the Publish button.
After publishing, you or others in your organization can search for the geocoding service under Catalog> Portal > My Content/Groups/All Portal. Right-click on the geocoding service to Add To Project and begin geocoding. Geocoding services are designated with a cloud above the locator icon. If no cloud is present, the locator has just been added to ArcGIS Pro from a local disk and is not shared with your organization.
